What Countertop Fabricators Need from Pricing Software
A practical checklist for evaluating quantity calculations, shop rates, revisions, and customer proposals.
Updated October 4, 2026
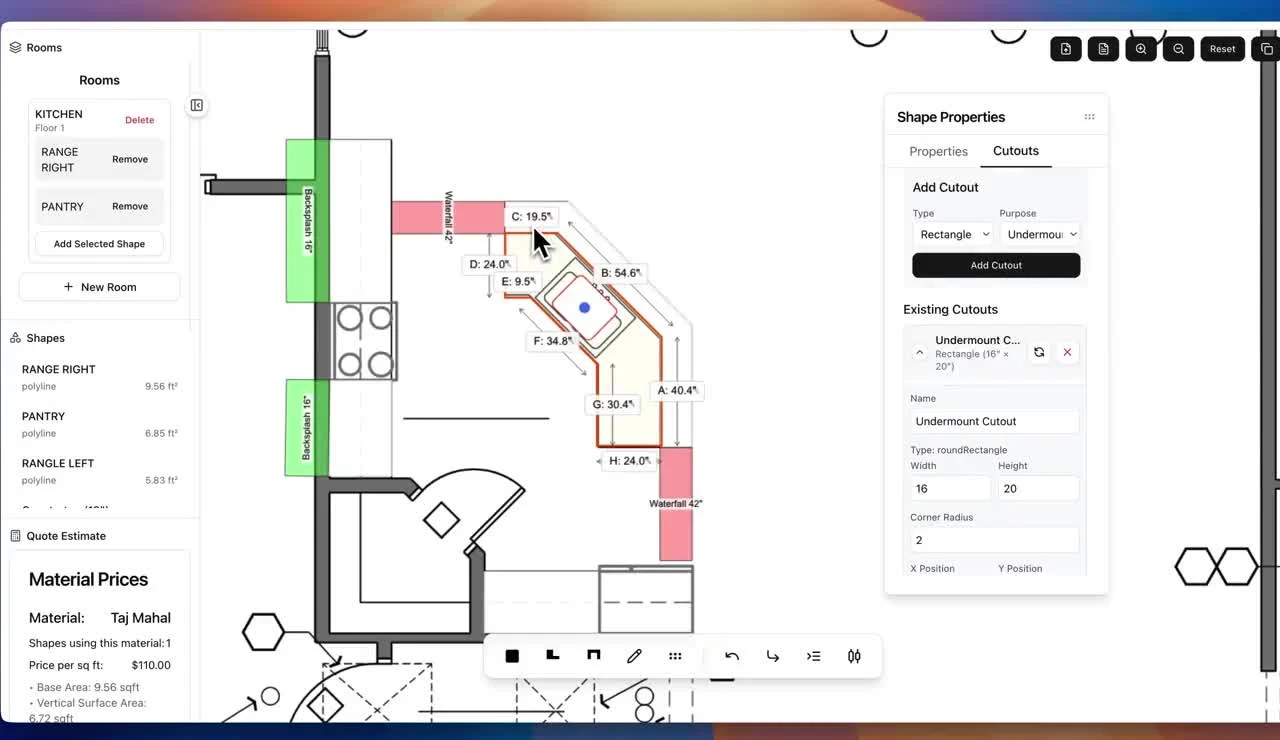
Keep quantities connected to the design
An estimator needs to see where a quantity came from. Area, edge length, splashes, and cutouts should remain understandable in relation to the drawing. When the design changes, review which quantities and charges are affected.
Test an actual revision during a software demo. A simple first quote may not reveal how the system handles the work your team does repeatedly.
Represent the way your shop charges
Material prices are only part of the proposal. Fabrication, installation, edge treatments, special handling, and other services may use different units and rules. Bring examples from your current price sheet.
Ask how exceptions are reviewed and how rates are updated. Decide who owns the pricing configuration and who can override a charge.
Make the calculation reviewable
Before sharing a quote, the estimator should be able to check the relevant quantities and line items. An automatic result still needs a clear explanation when something looks unexpected.
Include jobs with unusual shapes or several material options in your evaluation. Confirm rounding, units, and any minimum charges your shop relies on.
Help customers understand the proposal
A customer-facing quote should explain the selected material, design, included work, and next action. Visuals can clarify the layout, while line items and notes establish scope.
Keep alternates, exclusions, and unresolved assumptions readable. A polished presentation is most useful when it accurately reflects the work being sold.
Test the next handoff
Follow the approved quote into the project process. Identify what the office, templator, fabricator, and installer need, and whether any information must move into another system.
2cm connects drawing, material selection, quoting, and customer presentation. Bring your own rates and a representative job to see how that workflow fits your team.
A quantity check before you compare prices
For an illustrative rectangular top measuring 100 inches by 25.5 inches, the surface area is 100 × 25.5 ÷ 144, or approximately 17.71 square feet. That quantity is only one pricing input. Finished edge length, cutout counts, material billing rules, and installation charges still need review.
Run this kind of known example through a demo. Check the dimensions first, then compare each billable line with your shop’s rules. The PDF takeoff workflow explains how to establish scale; the quoting workflow connects the reviewed quantities with material and fabrication rates. Do not assume a surface-area estimate alone represents slab purchase cost.
Review a calculated nesting example
Our two-piece slab nesting example shows dimensions and calculated placements alongside the slab view. Use it to see how piece geometry affects placement. Actual fabrication also depends on slab conditions, supports, cutouts, and shop allowances.